Setting Up a Local WordPress Installation

Creating a local WordPress installation using XAMPP allows you to build and test your website offline before going live. XAMPP provides a convenient way to set up a local server environment on your computer. In this article, Doodlepyng will walk you through the process of setting up a local WordPress installation using XAMPP, enabling you to develop, customize, and experiment with your website before making it available to the world!
Step 1: Install XAMPP
The first step is to download and install XAMPP, a free and open-source software package that includes Apache, MySQL, PHP, and Perl. XAMPP creates a local server environment on your computer, simulating a web server.
Step 2: Start XAMPP Control Panel

Once XAMPP is installed, launch the XAMPP Control Panel. Start the Apache and MySQL modules by clicking on the “Start” buttons next to them. This will activate the local server environment required to run WordPress.
Step 3: Create a Database

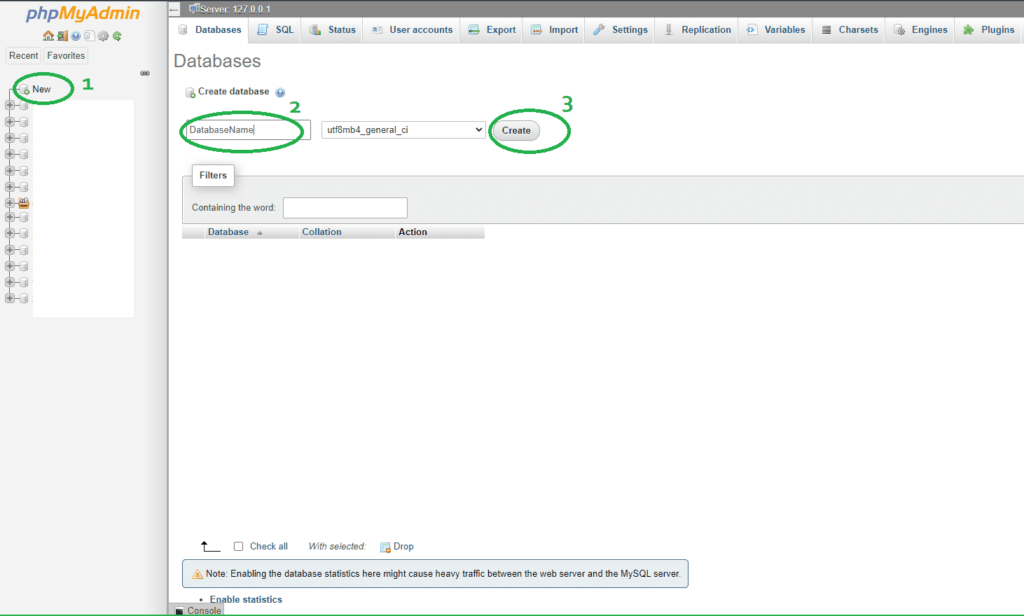
Open your web browser and navigate to http://localhost/phpmyadmin/. Here, you can create a new database for your WordPress installation. Enter a name for the database, and click “Create” to proceed.
Step 4: Download and Extract WordPress

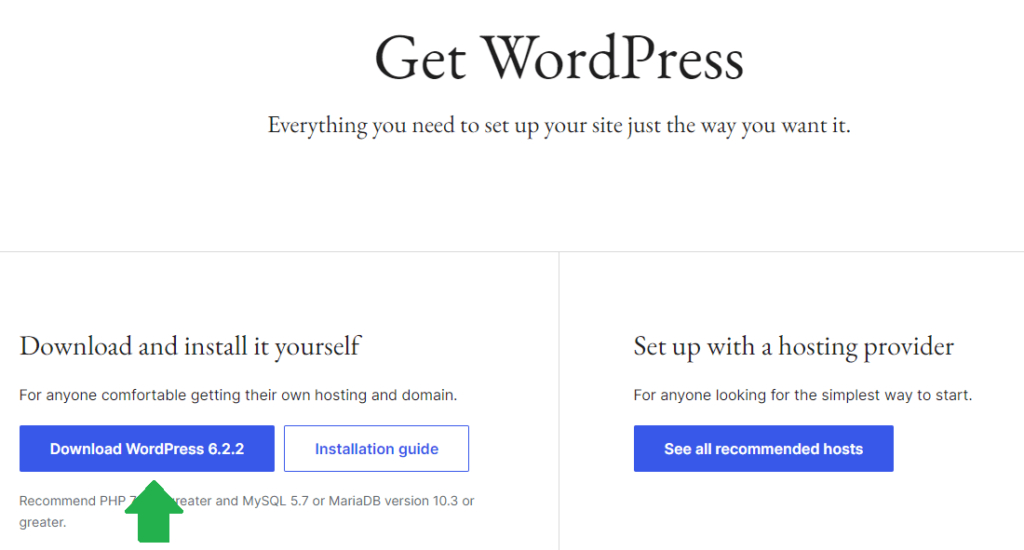
Next, visit the official WordPress website (https://wordpress.org) and download the latest version of WordPress. Extract the downloaded ZIP file into the “htdocs” folder located in the XAMPP installation directory on your computer.
Step 5: Configure WordPress
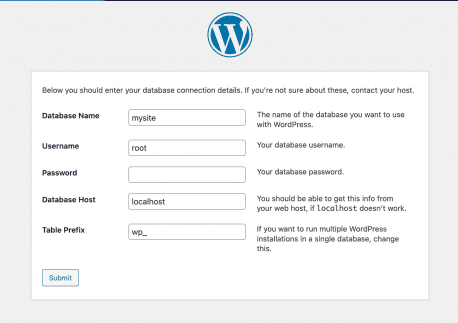
In the “htdocs” folder, locate the “wp-config-sample.php” file. Rename it to “wp-config.php”. Open the file in a text editor and enter the database details you created earlier. Save the changes.
Step 6: Install WordPress

Open your web browser and navigate to http://localhost/your-folder-name/wp-admin/install.php. Replace “your-folder-name” with the name of the folder where you extracted the WordPress files. Follow the on-screen instructions to complete the installation process. Provide a site title, enter username as “root”, leave password as blank, and email address to set up your WordPress admin account.
Step 7: Access Your Local WordPress Site
Once the installation is complete, you can access your local WordPress site by navigating to http://localhost/your-folder-name/. Replace “your-folder-name” with the name of the folder where you extracted the WordPress files. You will be able to log in to the WordPress admin dashboard by going to http://localhost/your-folder-name/wp-admin and start customizing your website.
Conclusion:
Setting up a local WordPress installation using XAMPP provides a convenient and efficient way to develop and test your website before going live. By following the step-by-step guide outlined above, you can easily create a local server environment, install WordPress, and start building your website with confidence. Utilizing a local installation enables you to experiment, customize, and perfect your website’s design and functionality before making it available to the online audience. So, take advantage of XAMPP and unlock the potential of your WordPress site by starting with a secure and efficient local development environment.